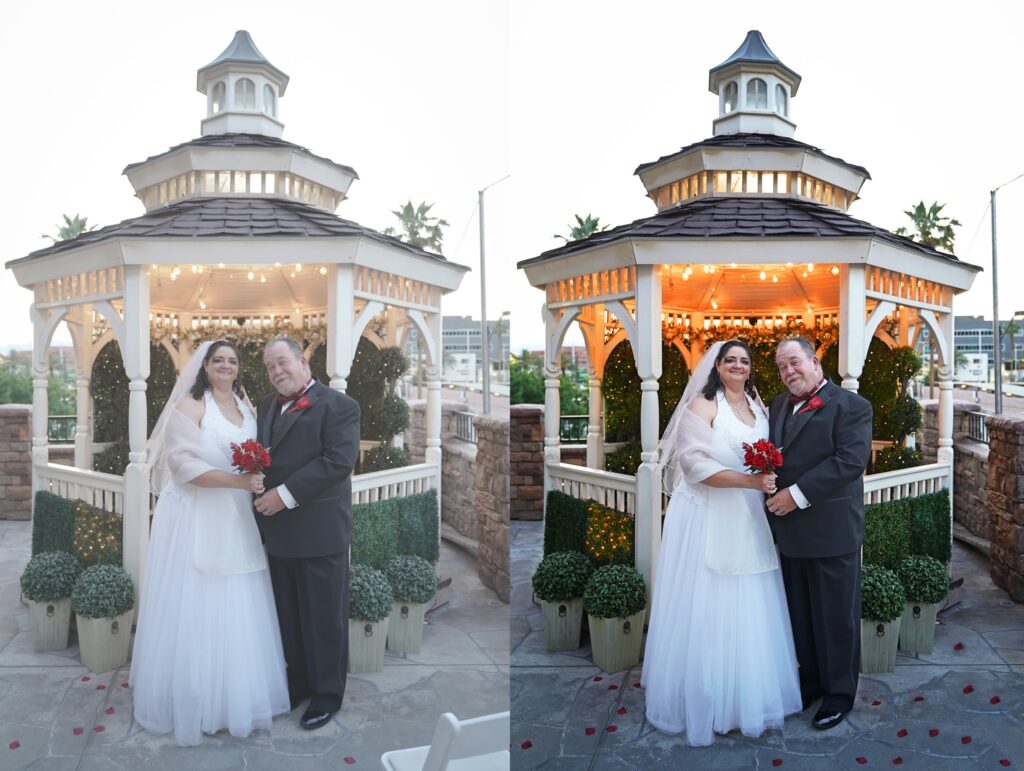
Why is it needed? Color correction in Photoshop is necessary for processing any images. After it, the photo will be brighter and more saturated, and with its help it will be possible to convey mood or symbolism.
How to set it up ? Photoshop is famous for its functionality, and working with color correction is no exception. This parameter can be configured through various tools, including automatic ones, and also using a special plugin.
Concept of color correction
When we photograph something, it seems that some kind of magical action is happening in the camera. Even if the result is just a blurry, fuzzy image weighing several megabytes.
When NTSC, a color television standard, was introduced in the United States in the post-war era, any color began to be described as a combination of three basic shades: green, red, blue. This is called the RGB color space, or RGB.

This space is quite limited. But if your computer monitor, smartphone or TV supports at least half of all RGB shades, then the picture will be quite bright and rich, since the incoming signal is adjusted by the monitor’s algorithms to improve the image.
Each device model has its own algorithms. Hence the difference between monitors in the accuracy of image display. But people strive for standardization, so they use color profiles and calibrate screens to minimize color distortion.
Correcting inaccuracies in the transfer of shades is called color correction.
In addition to eliminating shortcomings, color correction of a photo in Photoshop or another graphic editor allows you to correct shooting parameters if they were set unsuccessfully, and improve a photo that turned out mediocre due to difficult conditions. A common mistake made by non-professional photographers is shooting against the sun. Color correction is needed to make the photo more natural (although sometimes, on the contrary, they imitate such shooting).
Color correction in Photoshop is about arranging light, pulling out contrast, muting colors or making them more saturated. Such settings are needed not only when processing a photo of your favorite cat, but also, for example, when preparing a render of a room or a three-dimensional model of a house. The best option is to immediately create the necessary conditions on the set. But if this is not possible, then you will have to use graphic editors.
Color correction makes photos more emotional and allows you to create the right atmosphere.
Color is a powerful tool of influence when used as an artist. Look for the palette that matches the desired mood. Experiment with color settings in Photoshop. If, for example, you are retouching a photo of a young family against the backdrop of a spring landscape, then add warm tones – yellow, orange. And if you are shooting a post-apocalyptic photo shoot in an abandoned camp, then color the photo blue, make the shadows deeper and sharper.
Customizable Photoshop tools for color grading
Color Balance
This Photoshop option allows you to adjust the tonal balance of an image.
- A new adjustment layer of a special type is created – color balance.
- The tone to be corrected is selected.
- The desired slider settings are set.
It is very convenient to use it to color correct several shades at once in Photoshop: just move the sliders to select the desired tone.
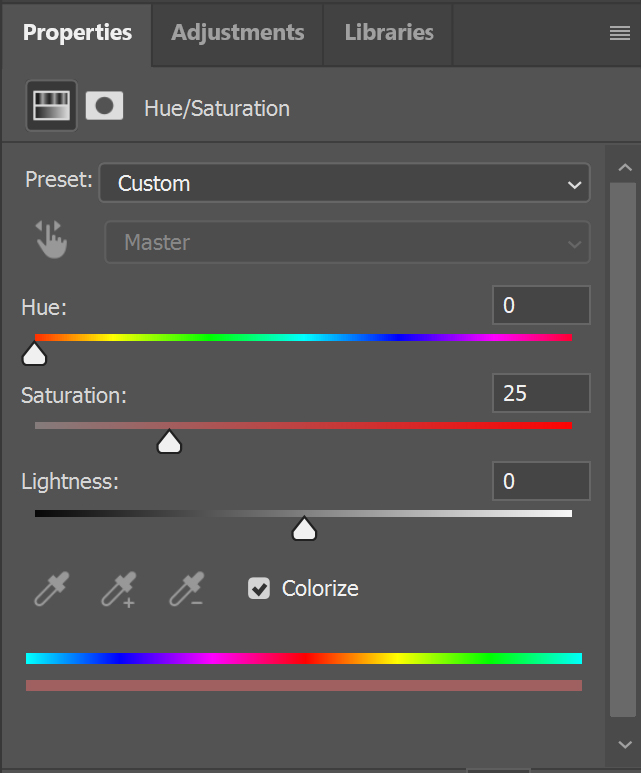
Hue/Saturation
Allows you to change both a single hue and all colors in the image. For example, you can make the sea pink by turning the slider in the range of blue or cyan shades in the direction of red. Here’s how it’s done:
- A new adjustment layer of type “Saturation/Hue” is created.
- By going to the drop-down menu, you need to select the range of interest and reduce or increase the color coverage in it.
- Tweak the saturation, brightness and hue settings to find the optimal combination.
You can not only adjust a specific shade, but change the colors of the entire picture. For example, give the sea a turquoise-green color by selecting “All” in the colors and moving the slider in the direction of green.
Filters as a method of color correction
Where would we be without photo filters? The program has them, moreover, you can configure them manually.
- To make color correction in Photoshop, open the picture, then in the top menu, in the “Image” item, select “Correction” – “Photo Filter”.
- Select a ready-made filter from the library or create your own by clicking on the “Color” box.
- Choose the color you like from the palette.
- You can turn up the “Density” to 100% to apply the filter more strongly. And if you only need light toning, 30-40% will be enough.
Juiciness and richness (Vibrance)
If your photos are too faded and you want to “add some heat,” this can easily be done in Photoshop. Just a couple of seconds is enough to increase saturation.
Just create a new “Saturation” layer.
Move the sliders in different directions to find the ideal balance of saturation and juiciness. This is a very powerful tool that allows you to create interesting effects.
However, you shouldn’t overdo it: too much saturation will make your photos unnaturally bright and give them acidic shades. However, if this is your creative idea – to turn all the settings to maximum – then you can try it.

Automatic Color Correction Tools in Photoshop
You can do color correction in Photoshop automatically, without having any knowledge of the program. These tools can be found in the top menu item “Image”.
Auto Tone
This is a universal option that allows you to immediately edit both color balance and contrast. Contrast in this case is ensured only by working with shades, and not by changing the ratio of darkened and lightened areas. Photoshop analyzes the image and slightly changes the colors in accordance with special algorithms, while the contrast itself also changes. The convenience lies in the fact that all color correction operations are carried out with one click.
“Auto Contrast”
The program, having assessed the difference between the darkest and lightest parts of the picture, automatically adjusts their ratio. “Auto Contrast” makes better even those pictures that at first glance are already quite contrasts. Either way, this tool is worth a try.

“Auto Correction” (Auto Color)
The principle of operation here is the same as that of Autotuned, but the algorithm is slightly different, and color correction is more natural and soft.
Automatic settings in Levels and Curves
These are professional-level color correction tools that allow you to set more flexible color correction settings. But they also have built-in functions that allow you to correct contrast and color shifts automatically.
Go to the top menu item “Image” and expand the list of “Adjustments” options there.
The interface of these two tools is different, but the functionality is almost the same. Use three pipettes next to each other.
The middle one only corrects shades. By clicking with this eyedropper on the part of the picture that should acquire a neutral gray color, you will see how the tonality of the entire picture changes.
The eyedropper on the left is responsible for the darkest areas of the photo. Having processed this “black point”, Photoshop automatically performs color correction for other areas.
The “white point” is adjusted with the right eyedropper. It is clicked on the area that needs to be made absolutely white. When the lightness of a point changes, the program will automatically adjust the rest of the image to match it.
(You can cancel the results of any of the eyedroppers if something went wrong: click on another area of the image or press Ctrl (⌘) + Z. Sometimes you have to click on several different points in a row)
The extreme pipettes, if applied one after another, allow you to make the photo more contrast. But it’s better to leave tone correction for last.
Color grading in Photoshop using a plugin
A special NiK Collection plugin has been created for Photoshop, which is free to use and includes a whole set of packages, the most popular of which is Color Efex Pro. When you install the plugin, it will be added to the Filters tab. Go there and explore the proposed presets for automatic color correction. Check out the Cross Processing collection: a list of different gradients that can be adjusted separately for shadows and highlights. The intensity of use of presets is also adjustable.
If you need to stylize a photo by changing its temperature balance (for example, replacing warm tones with cool ones), use Photo Stylizer.
Indian Summer is another interesting action game with several presets with which you can “burn out” the grass, coloring it red and yellow.
A cool level of color mixing is provided by the Ink package. We recommend you try it.
The Color Efex Pro package contains filters that increase contrast (color, tonal, overall), blur the picture in a glamorous style, soften the focus, create haze or fog, increase clarity, etc.
Rules for working with color correction in Photoshop
When it comes to color correction tools, Photoshop is one of the leaders among image editors. Using it, you can darken or lighten the photo, set the desired contrast. However, before you fiddle with the settings, check out a few basic tips.
Retouching should only be done on calibrated monitors for which a special profile has been created . Without accurate calibration and profiling, it is difficult to color correct in Photoshop: the image on your monitor will not appear exactly the same as on others.
Color balance and tonal range are best adjusted using layers . Then you can go back a few steps to further edit the tone, and you won’t have to delete the entire image: the changes are reversible. However, the more layers in a file, the heavier it is, which means that the computer will require more powerful RAM. Tone and color settings are brought to the Adjustments panel, and adjustment layers are created automatically.
